Creating a Cloud Template yaml file using chatgpt v.4.0:
In the previous post, I tested creating a YAML file with ChatGPT. The result was missing information, so I tried a newer version to see whether it would produce a more complete template.
I started like last time:
**Me: **
Write me a aria automation cloud template, for a windows 2019, with a c disk with 100gb, and 3 additional disk. a DB disk with 300gb with letter E, a log disk with 120gb with letter F and a temp disk with 50gb with letter G. The vm uses NSX network, and needs 4 cpu and 16gb ram.
ChatGPT4:
Creating an Aria Automation Cloud template involves defining the virtual machine specifications, including CPU, memory, storage, and network. Here is an example YAML file you could use:
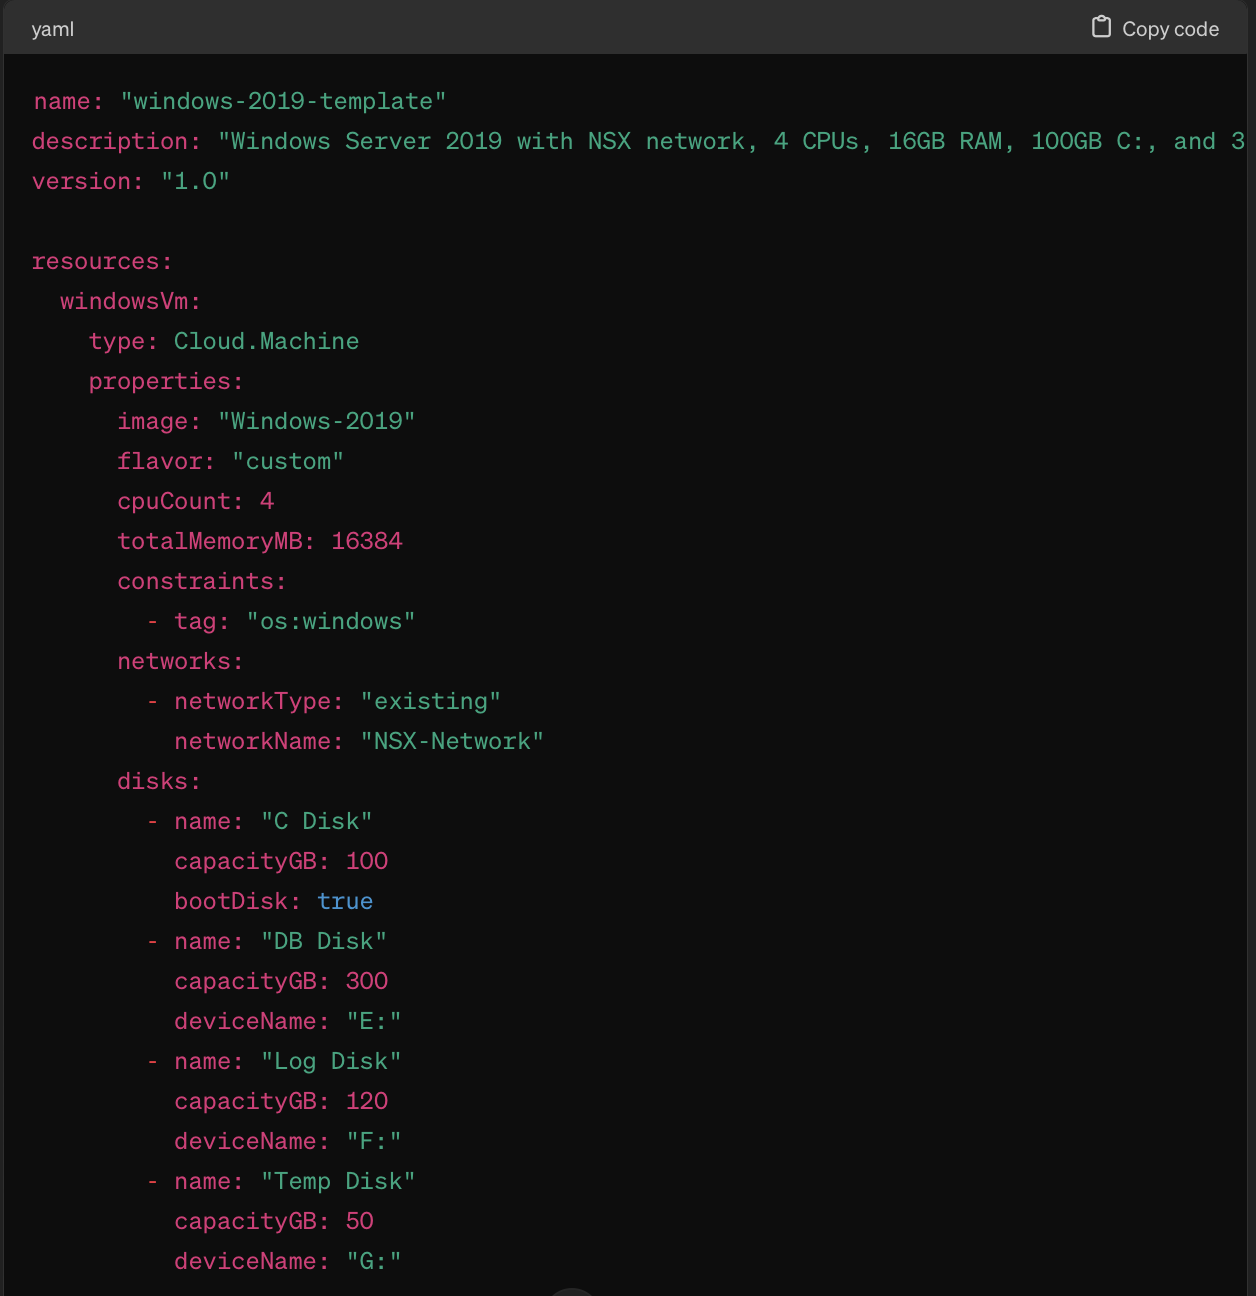
Notes:
- Replace Placeholders:
Replace Windows-2019 with the actual image name in your cloud template.
Replace
NSX-Networkwith your actual NSX network name.Disk Device Letter:
The deviceName property specifies the drive letter. Ensure the disk initialization and formatting script handles the drive letter assignment correctly.
- Flavors:
If custom flavors are not available, use a pre-defined flavor that matches the desired CPU and memory configuration.
Cloud-Init or PowerShell Customization
To ensure the correct disk letters and formatting, include a customization script. You could use a PowerShell script like this:
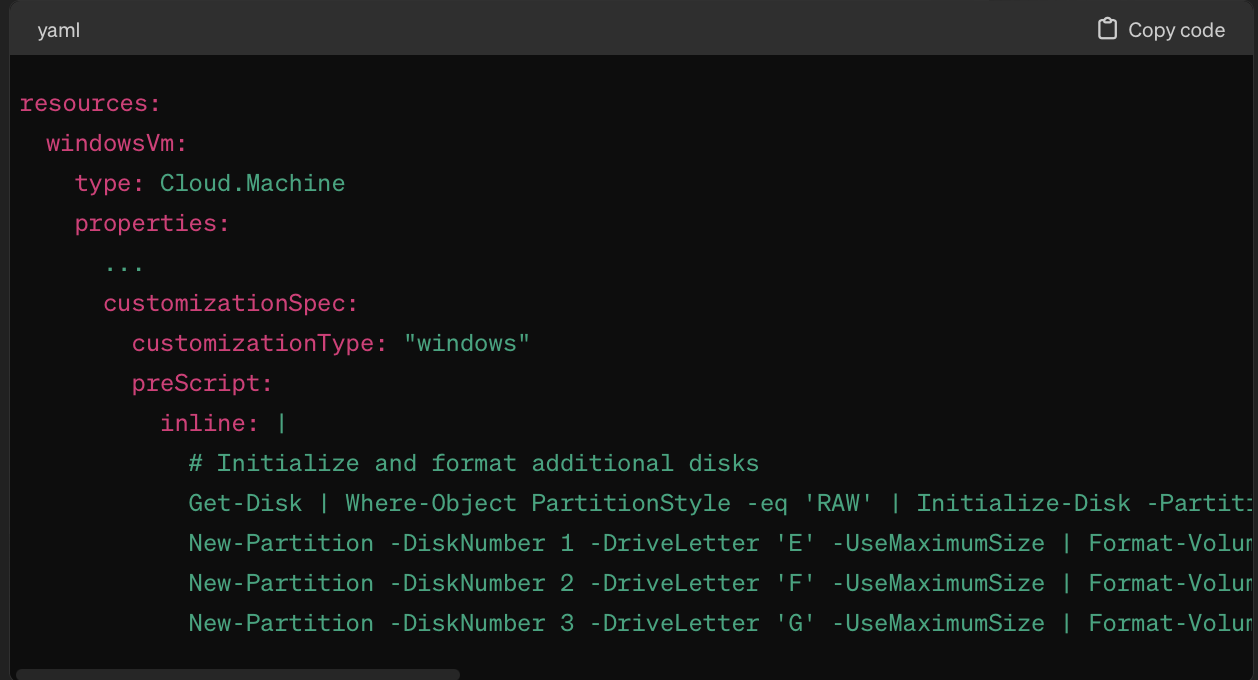
Integrate the script into the YAML file:
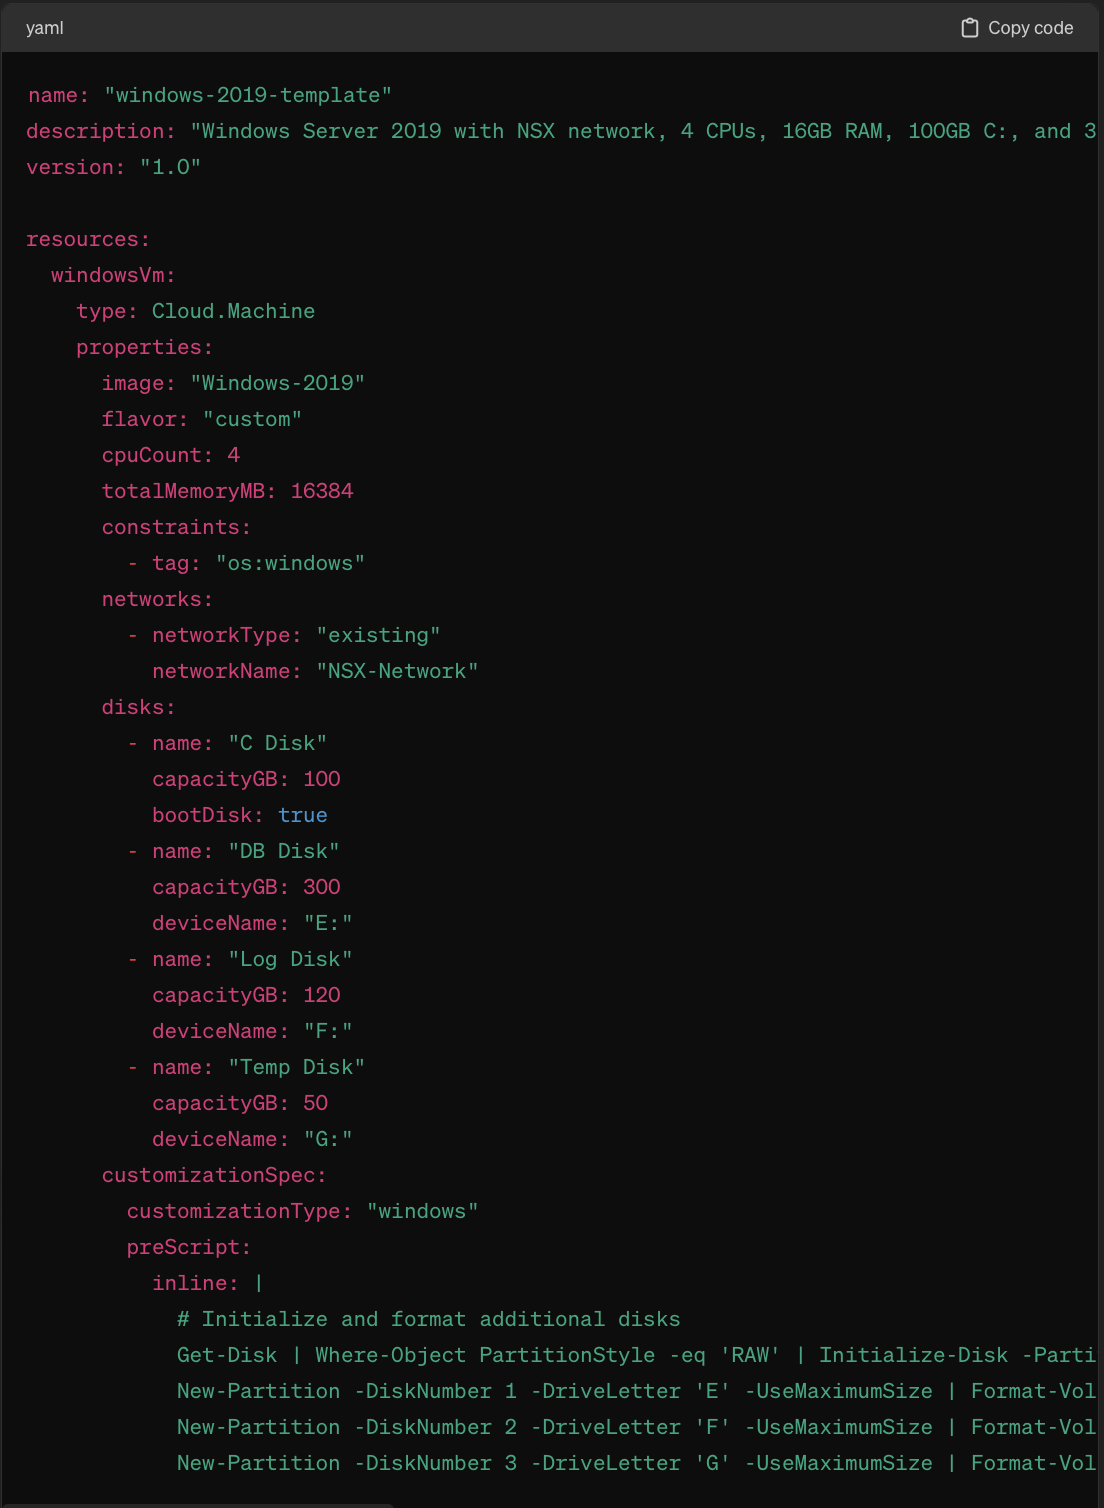
The additional disks will be formatted and ready to use in Windows.
Here’s a summary of how the customizationSpec works in this YAML template:
Pre-Script: Runs the provided PowerShell commands to initialize, partition, and format the additional disks.
Drive Letter Assignment: Ensures each disk is assigned a specific drive letter as requested.
Adjusted Template
Here’s the adjusted template with a complete PowerShell script:
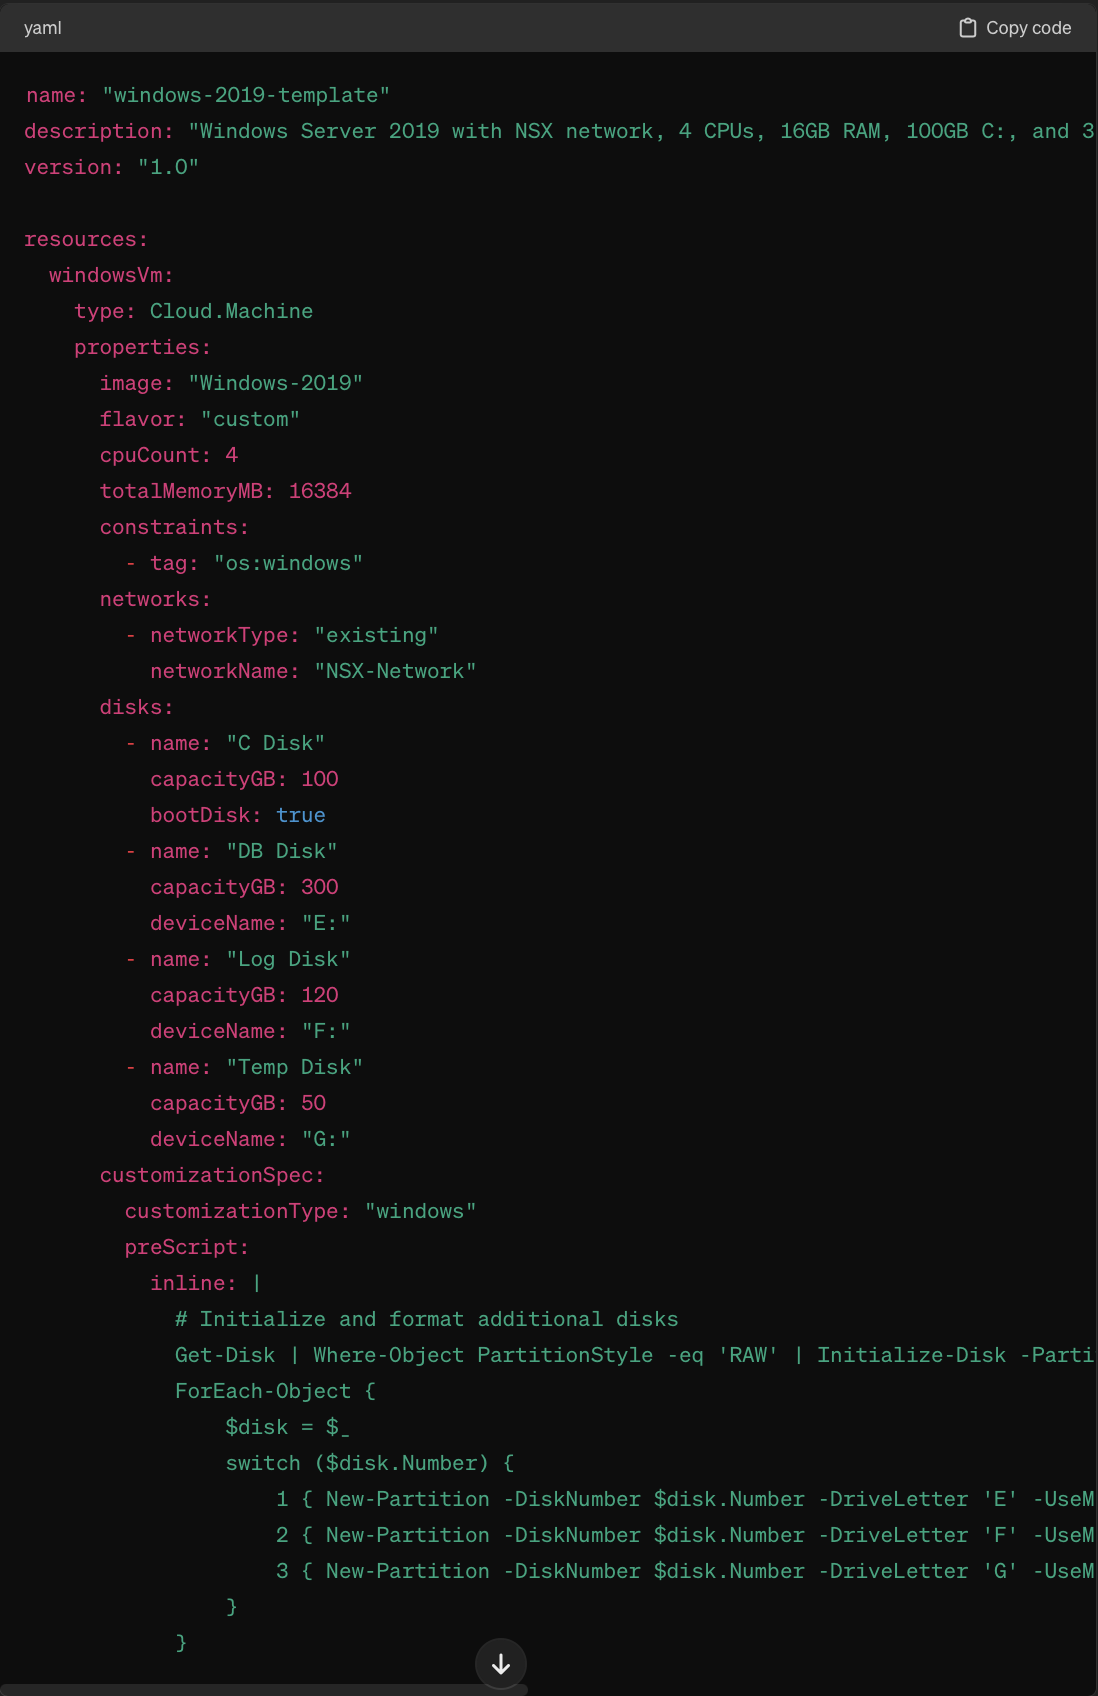
Notes:
- PowerShell Script Logic:
The script identifies uninitialized disks (PartitionStyle is RAW).
Initializes them and assigns specific drive letters.
Formatting Details:
The Format-Volume cmdlet creates an NTFS filesystem on each new partition.
- Disk Number Assumption:
The script assumes that the additional disks will have numbers starting from 1.
- If the disk numbers change due to configuration, you might need to adjust the
switchstatement.
CODE:
| |
ChatGPT 4.0 produced a more complete template and included more of the required settings. I still found settings missing, so I asked another question:
Me:
Are there any other settings in the template we need ?
ChatGPT4:
In addition to the CPU, memory, disk, and network configuration already provided in the template, there are a few other important settings you might want to include:
1. Security Settings
Ensure Windows Firewall or other security configurations are in place.
2. Domain Joining
If the VM needs to join a domain, you can use the domainJoin property.
3. Admin Credentials
Specify admin credentials for access post-deployment.
4. Time Zone Configuration
Set the time zone if needed.
5. NSX Advanced Settings
In cases where NSX needs specific configurations, you might need additional settings.
Enhanced Template Example
Below is a more comprehensive template including the additional settings:
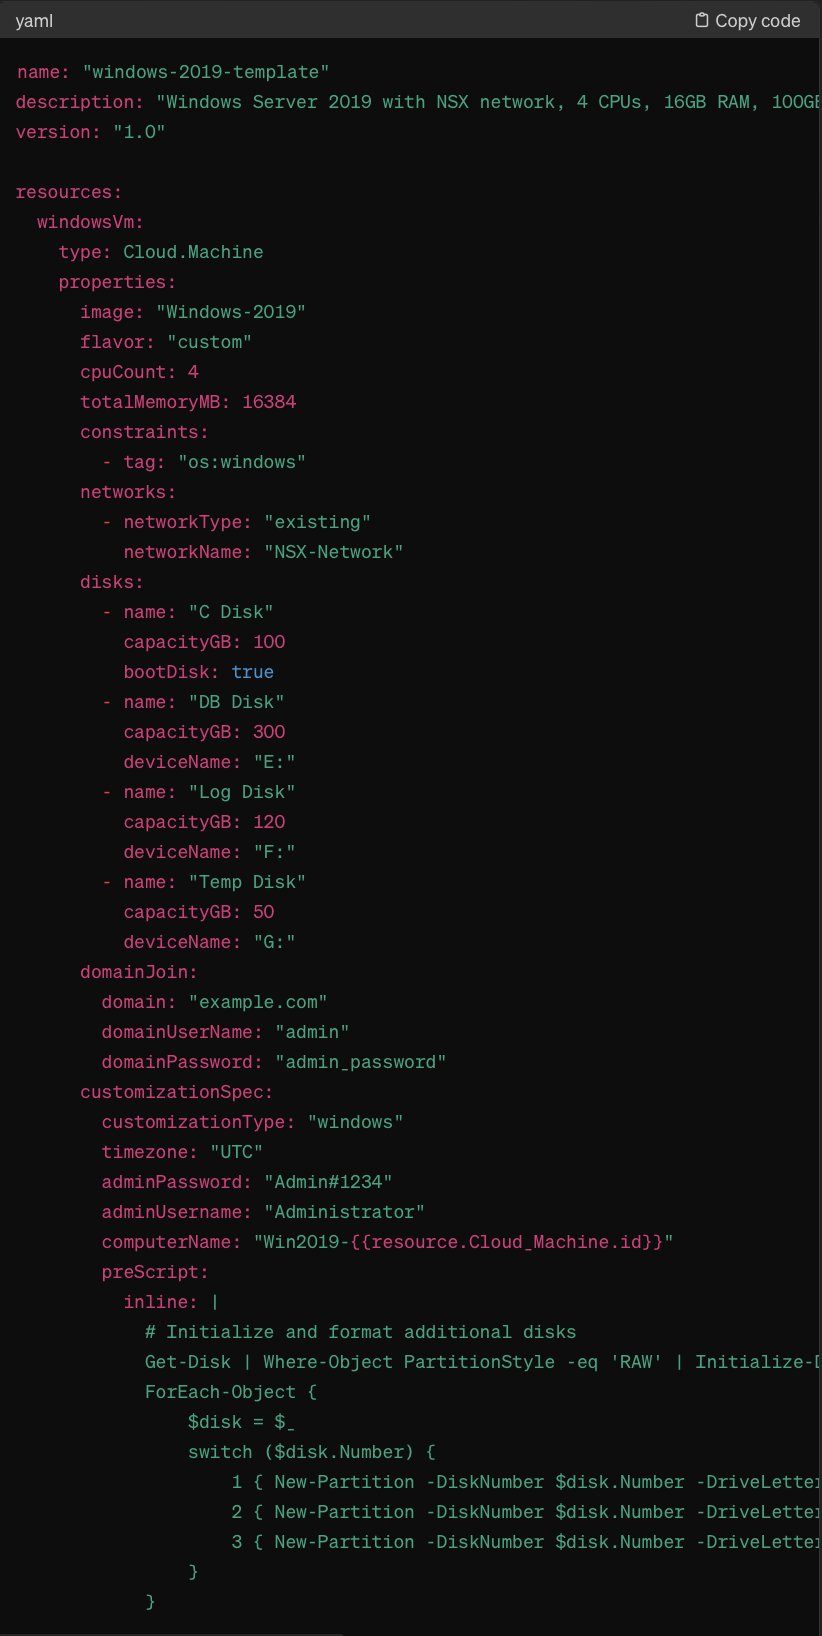
Explanation of Additional Settings
- Domain Join
domain: Domain to join (e.g., example.com).
domainUserName: Username with sufficient privileges to join the domain.domainPassword: Password for the user.Admin Credentials
adminUsername: The username of the administrator account.
adminPassword: The password for the administrator account.Computer Name
Automatically generates a unique computer name using the VM’s resource ID.
- Time Zone
Specifies the Windows timezone setting (timezone property).
Security Reminder
Make sure sensitive information like passwords are handled securely and use secrets management where possible.
This produced a better answer, but only after I asked a more complete question.
With the extra settings, I now have a better YAML file to test. I still expect to adjust it after importing it into my environment.